
AI EMBROIDERY STUDIO / LESSONS
Thirty small lessons. A confident first stitch.
Start at lesson 1, or choose the skill you want to practice. Twenty-four machine-embroidery lessons and six hand-stitch lessons make room for both practical skills and creative exploration.
Beginner · 30 sample tutorials · English / Español
Start here · Free beginner path
From curious to confident.
Begin with these five free lessons. Follow the sequence, keep notes, and prepare your first project without pressure. You do not need to purchase access to get started.
01
Know your machine
Identify your model, manual, and compatible accessories.
02
Build your practice kit
Gather practice fabric, thread, stabilizer, and tools.
03
Understand design files
Recognize the difference between artwork and stitch files.
04
Choose your first design
Start with a small, simple design.
05
Check your hoop
Confirm that the design fits the embroidery area.
Your readiness checklist
- I have my machine manual and know its supported file format.
- I can distinguish a mockup from a stitch file.
- I have checked the design size and hoop.
- I have prepared practice fabric and suitable stabilizer.
- I will sew a sample before stitching a valuable item.
Three projects to plan your next step.
Placeholder project examples; these are not recorded classes or finished products.
Your first sampler
Plan a simple one-color design on practice fabric. Follow your machine instructions before stitching.
Practice project · Preview
A personal name
Prepare the name, placement, size, and colors for a future sample.
Practice project · Preview
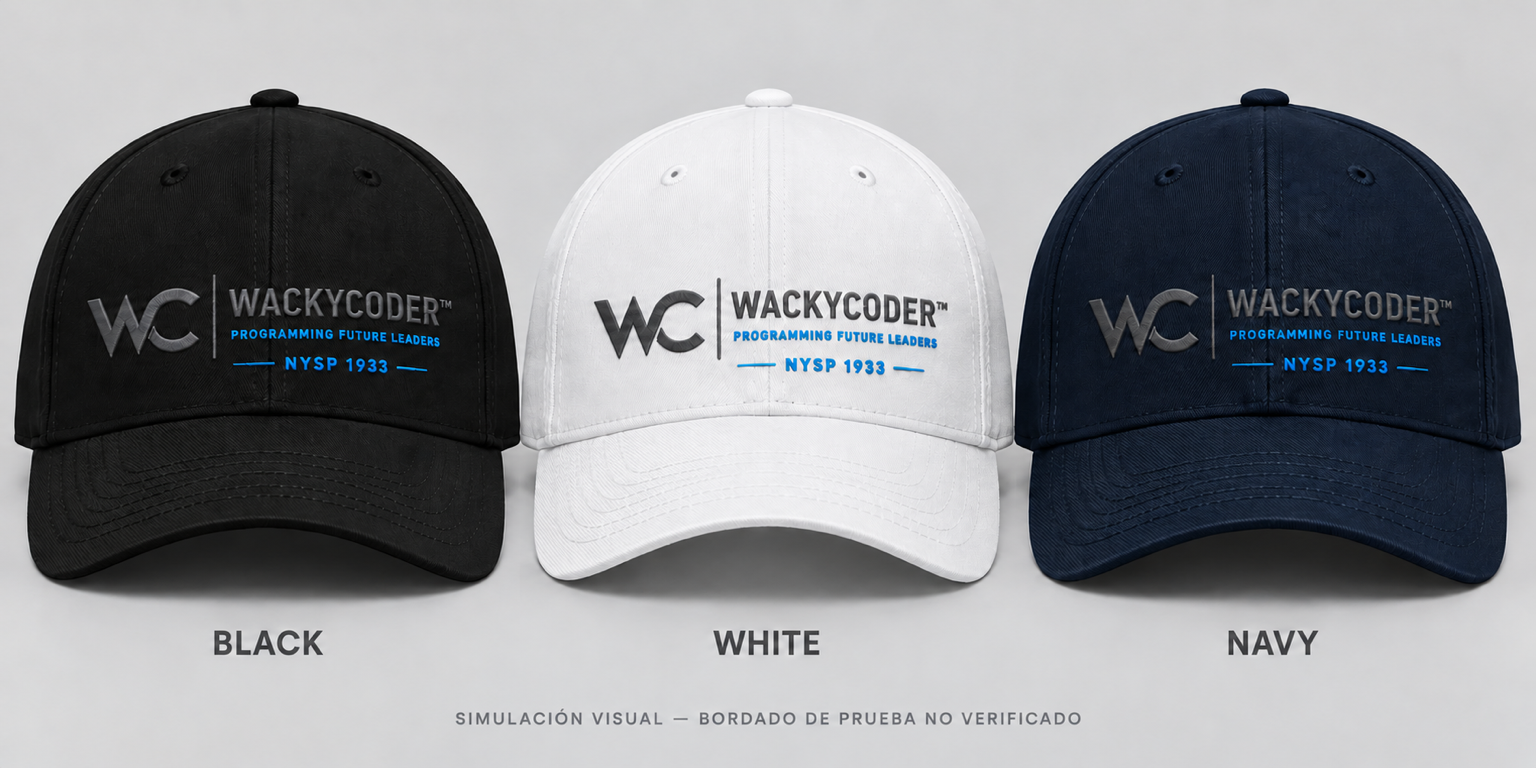
A signature cap
Use the WackyCoder concept to plan the front, back, and strap. Stitch a cap only with compatible equipment and accessories.
Practice project · Preview
Quick help for beginners.
Is an image an embroidery file?
No. Machine embroidery needs digitized stitch instructions; artwork and mockups show appearance only.
Which file format does my machine need?
Check the manual for your exact model. Verify the supported format, design dimensions, and hoop before transferring files.
Why is my fabric puckering?
Review the stabilizer, hooping, and design suitability for the fabric. Repeat a sample and change one factor at a time.
What should I do when thread breaks?
Stop the machine as your manual instructs. Check threading, needle condition, thread path, and the settings recommended for your model.
How do I know a design is ready?
A mockup does not establish production quality. Sew a sample on equivalent materials and check readability, alignment, and finishing.
Video demonstrations — planned
Space reserved for original demonstrations of hooping, a first sew-out, and stitch review. No videos are published yet.
Try five lessons free.
Lessons 1–5 are available below. Access to Lessons 6–30 will be offered through a one-time payment, with English and Spanish included.
Enrollment is not open yet. Provisional prices are listed below; payments are not being accepted.
Placeholder pricing
Learn your way.
Base rate: $30 USD per hour. Choose a single hour, a discounted bundle, or the library for self-paced learning.
Single hour
$30 USD
1 hour of guided instruction.
$30 per hour
5-hour bundle
$135 USD
5 hours of guided instruction.
$27 per hour · Save $15
10-hour bundle
$240 USD
10 hours of guided instruction.
$24 per hour · Save $60
Lesson library
$60 USD
Access to Lessons 6–30 in English and Spanish.
One-time payment · Self-paced
The first 5 lessons are free. The library does not include guided instruction hours; hourly bundles do not automatically include library access.
These are provisional prices and may change before enrollment opens. Enrollment and payments are not yet available.
Choose your next skill.
01 / BEGINNER
Start here
01Meet your embroidery machine
Goal: Identify the controls before stitching.
You need: Your machine, its manual, a notebook.
Steps
- Find the power switch, start/stop control, needle area, embroidery unit, and hoop attachment in the manual.
- With power off, match those names to the actual parts.
- Read the threading, needle-change, hoop-attachment, and emergency-stop instructions for your model.
- Write a short setup checklist; keep hands clear of the needle and moving hoop during operation.
Practice: Label five parts in a notebook sketch.
Check your result: You can locate the stop control without searching.
Common mistake: Copying settings from a different model.
02Build a simple practice kit
Goal: Gather supplies for low-pressure samples.
You need: Stable woven cotton scraps, compatible hoop, embroidery thread, prescribed bobbin thread, suitable needles, stabilizer, small scissors.
Steps
- Check the manual for compatible needle, thread, bobbin, and hoop requirements.
- Choose plain woven cotton for initial tests rather than a stretchy or expensive garment.
- Set out fabric and stabilizer pieces large enough to be gripped by the hoop.
- Separate sharp tools from the machine’s moving area and label your practice supplies.
Practice: Prepare enough material for three small tests.
Check your result: Each supply has a clear purpose.
Common mistake: Buying many accessories before checking compatibility.
03Artwork, mockups, and stitch files
Goal: Understand what each file actually does.
You need: One JPG or PNG example and one licensed embroidery design.
Steps
- Identify the artwork image: it shows appearance but does not contain a machine’s stitch instructions.
- Find the machine design’s listed dimensions, stitch data, and file format.
- Check your exact machine’s supported format in its manual.
- Keep artwork, visual mockups, and machine files in separate folders; digitizing creates stitch data, while format conversion changes existing stitch data.
Practice: Sort three example files into the correct folders.
Check your result: You can explain why renaming a JPG to .PES does not digitize it.
Common mistake: Treating a realistic mockup as a production-ready design.
04Choose your first practice design
Goal: Start with a manageable, licensed design.
You need: A built-in design or legally obtained beginner design.
Steps
- Pick a small, simple one-color design intended for woven fabric.
- Read the designer’s size, hoop, stabilizer, and thread guidance.
- Confirm its actual stitch area fits your machine’s supported embroidery field.
- Keep the original file unchanged and use its supplied size for your first test.
Practice: Compare two designs and choose the simpler one.
Check your result: The design fits the supported field and has clear instructions.
Common mistake: Starting with dense artwork, tiny lettering, or a complex cap design.
05Read hoop and design dimensions
Goal: Avoid confusing hoop labels with usable stitch space.
You need: Hoop specifications, design information, ruler.
Steps
- Write the design’s width and height in one unit, millimeters or inches.
- Compare them with the machine’s supported stitch area for the selected hoop.
- Draw a paper rectangle at the design’s real size and place it on your sample fabric.
- Check orientation and whether rotating the design changes the fit; preview without altering the original.
Practice: Make a paper template for your chosen design.
Check your result: The complete design fits the usable stitch area.
Common mistake: Assuming the hoop’s outside dimensions are the embroidery field.
06Plan a readable color palette
Paid-library lesson. Enrollment is not open yet.
02 / BEGINNER
Prepare to stitch
07Match stabilizer to your sample
Paid-library lesson. Enrollment is not open yet.
08Hoop a woven cotton sample
Paid-library lesson. Enrollment is not open yet.
09Mark the center and orientation
Paid-library lesson. Enrollment is not open yet.
10Thread the machine correctly
Paid-library lesson. Enrollment is not open yet.
11Check the needle before a test
Paid-library lesson. Enrollment is not open yet.
12Run a boundary check
Paid-library lesson. Enrollment is not open yet.
03 / BEGINNER
Your first projects
13Stitch your first one-color sample
Paid-library lesson. Enrollment is not open yet.
14Review a finished sew-out
Paid-library lesson. Enrollment is not open yet.
15Practice a two-color sequence
Paid-library lesson. Enrollment is not open yet.
16Create a simple name sample
Paid-library lesson. Enrollment is not open yet.
17Plan embroidery on a tote
Paid-library lesson. Enrollment is not open yet.
18Plan a cap design before stitching
Paid-library lesson. Enrollment is not open yet.
04 / BEGINNER
Troubleshoot & finish
19Troubleshoot puckering methodically
Paid-library lesson. Enrollment is not open yet.
20Respond to a thread break
Paid-library lesson. Enrollment is not open yet.
21Investigate gaps and shifted outlines
Paid-library lesson. Enrollment is not open yet.
22Remove stabilizer and finish neatly
Paid-library lesson. Enrollment is not open yet.
23Keep a sample and file notebook
Paid-library lesson. Enrollment is not open yet.
24Write your first project brief
Paid-library lesson. Enrollment is not open yet.
05 / BEGINNER
Hand-stitch basics
25Set up a hand-embroidery hoop
Paid-library lesson. Enrollment is not open yet.
26Practice running stitch by hand
Paid-library lesson. Enrollment is not open yet.
27Practice backstitch by hand
Paid-library lesson. Enrollment is not open yet.
28Fill a small shape with satin stitch
Paid-library lesson. Enrollment is not open yet.
29Make a detached-chain flower
Paid-library lesson. Enrollment is not open yet.
30Finish a beginner stitch sampler
Paid-library lesson. Enrollment is not open yet.
Further learning
Manufacturer instructions and technique references support further study. These are independent reference links; no affiliation or certification is implied.